Wednesday, May 22, 2013

80 Thoreau

_DSC2151

"After you get off Route 2, run right on Walden Street, and then turn left on Thoreau."

We chuckled a bit as we listened to ourselves talk, but we weren't making this up. These are actual street names in Concord, Massachusetts, a town about 45 minutes north of Boston. In fact, the legendary Walden Pond where Henry David Thoreau penned his famous book Walden is just down the street from our destination.

And yes, it's that Concord - the historic other half of "Lexington and Concord"

I was in a car with three of my other female friends. We were going out solo - without the husbands - to celebrate my friend Liz's birthday. We wanted to go somewhere special, yet we also had to take into the major consideration that Liz was very very (we're talking close to nine months) pregnant (aka no fancy sushi or grand wine pairings).

Our choices were immediately limited severely by the fact that Liz's birthday just happened to land on the day of Boston University's graduation.

Uh oh. Every single reasonably nice restaurant in Boston was booked solid. A brief search through Opentable gave very unsatisfying results.

Thankfully, Liz decided to go outside the box (and the city) and found us a reservation at 80 Thoreau in Concord. Yes, we would have to drive out a bit, but the reviews for the place were stellar, and Liz had managed to book us the most exclusive and special seats in the house.
_DSC2113
Open since April 2011, 80 Thoreau is the brainchild of Ian Calhoun and Vincent Vala, two friends who vowed they would open a restaurant together someday while they were students at Cornell University's School of Hotel Administration.

It didn't happen immediately. Ian spent some time in Paris before moving to New York. He finally returned to Massachusetts to study business at Harvard. Vincent spent time in Florida post- graduation before moving to New York to gain experience working with Thomas Keller at Per Se and Tom Colichio at Craft.

Finally, in 2011, they were able to come back to Concord, the historic town where Ian grew up, to open up their first restaurant. They brought on board Chef Carolyn Johnson, who has cooked at many top restaurants in Boston, such as Salamander, Icarus, and more recently, Rialto.
_DSC2114
80 Thoreau is located right at the Commuter Rail station in Concord. Even if you don't have a car, you can take the commuter rail almost straight to the restaurant's door steps. 80 Thoreau sits right next to the train station. Some say you can even hear the rumble of trains going by on occasion (we did not hear any during our meal).

Though the restaurant's at the top of these long, menacing stairs, there's a nice elevator around the corner, which Liz was only far too happy to use.
_DSC2120
The menu consists of New American dishes inspired by local and seasonal ingredients. Concord is actually near several farms, which allows the restaurant great access to some hyper local produce. Appetizers (or "first courses" as they are called on the menu) range from $8-$14 while entrees hover between $23-$31. There's also a bar and a bar menu, which includes both small "bar bites" ($4-$12) and "bar plates" ($14-$15) which could easily be dinner on a casual weeknight.

You can't tell from the photo, but the ambiance is lively and reasonably relaxed. The space is surprisingly large, with a reasonably sized bar area and two dining rooms.
Beata, Liz, and Christina at 80 Thoreau
The best seats in the house, however, are at the chef's counter. There are only four of these exclusive seats in the entire restaurant.
_DSC2125
At the chef's counter, you get front row seats to all the action that's happening in the kitchen. It's fascinating to watch how a perfect steak is grilled, what steps are involved in making tempura lemon "confit", and why you need warm hands to form the perfect ice cream canelles.

 I asked our server if there was another kitchen elsewhere, and she said no. You are seeing everything right in front of you (it's immaculate, might I add).
_DSC2144
But the best part of the chef's counter is the access to the special Tasting Menu. The Tasting Menu is only offered on Thursday, Friday, and Saturday, with two seatings a day: one at 5:45, the other at 8:30. That's a maximum of 24 seats a week.

The menu changes weekly, is kept "under wraps" until service, and almost always features current seasonal ingredients created with extra oomphs of creativity. Because of the small amount of diners per week, the chef is able to use more luxurious ingredients and time/labor-intensive techniques to create some pretty unique dishes.

We couldn't wait to get started.
_DSC2124
We began with a Pisco Sour amuse. It was bright, full of citrus, just a tad of a sparkle - a perfect way to begin the tasting menu.
_DSC2130
Along with the cocktail came another amuse of these baby French Breakfast Radishes, which were smeared with herb-infused butter (sage, rosemary, and thyme).

"The cocktail's not too sweet," said my friend, Christina.

I'm not a huge fan of sweet cocktails in general, and I often find them to be too sweet. I agreed with Christina though, this cocktail was perfectly fine.
Jen & Christina at 80 Thoreau
Christina and I are kindred spirits in some ways. We both have relatively small appetites and struggle with finishing tasting menus. We lamented about how oftentimes the last course in a tasting menu just doesn't taste good to us. It's not because it's actually a bad dish, it's usually because we are so full we have absolutely no ability to enjoy food by that point.

I told her my typical game plan, developed through the constant tasting menus I've experienced in the past several years:

1) Don't be afraid to start packing leftovers, even if you are only on course 3 of a 5-6 course tasting.
2) Eat slowly.
3) Don't fill up on bread.
_DSC2131
Famous last words.

The freshly baked bread (whole grain and light sourdough) soon arrived. We found out it was from Iggy's in Cambridge and it was fantastic. We all especially loved the sweet, nutty wholegrain bread and couldn't get enough of it.

"I totally want to stop by Iggy's in North Cambridge and pick up a loaf of this bread."

Within ten minutes, not a single sliced of wholegrain bread remained on the table.

So much for my game plan.
_DSC2132
The first official course, "Chilled Asparagus" came served over asparagus chèvre and topped with microgreens  tossed in a truffle Merlot vinaigrette. Wild flowers from mustard and chives completed the fresh spring look of this dish.

The truffle aroma was intoxicating yet subtle enough that it did not overpower the dish. My friend Liz longed for more mustard flowers, which she felt added a unique grassy and forward element that enriched the rest of the dish beautifully.

"That is the best asparagus dish I've ever had in my life," said Liz.
_DSC2135
The next dish was phenomenal, and my personal favorite bite of the evening. The lovely Smoked Scallop Raviolis were handmade and possessed that perfect soft but chewy texture. We couldn't get enough of that incredible scallop and potato filling.

After inquiring a bit more, we learned that the scallops are cured for two days with citrus, salt, sugar, and herbs before being smoked at very low heat over hickory chips for a long time.

We absolutely loved the intense smokiness of the scallops (it was almost like there was bacon in there, even though there was not!), which combined nicely with the potatoes inside the ravioli. The pea puree (and fresh peas!) added a lovely spring touch to the whole bite.
_DSC2137
For our third course, we had the Seared Tilefish, which was so soft we could easily cut it with a fork. It was served over sea beans (a legume), a bed of sweet, creamy parsnip puree, and a "tempura confit lemon slice" (which we'd watched them fry earlier right in front of us!).

The flavors of this dish were quite good. We all agreed that the lemon was a necessary component in each bite, mostly for the tart balance that it brought to the dish, but also for the crunch.
_DSC2142
The tasting menu was already screaming Spring! yet there was more to come.  Our final course consisted of a Roasted Rabbit Loin that was artfully rolled up with mushroom risotto and ramp leaves with rabbit jus. This was served alongside various springtime components, such as braised morel mushrooms (yum), spring greens tossed with a chardonnay vinaigrette, and a deeply flavorful puree made from fava bean shells (can you believe that?), anise, and cumin. It was wonderfully earthy and even my friend Beata, who hates the taste of licorice, loved the fava bean puree.

The rabbit meat was admitted just a bit on the dry side, but the flavors of the overall dish were excellent. I even brought home some leftovers for Bryan to try (remember the game plan?), and he said the rabbit loin was his favorite course in terms of overall flavor.
_DSC2143
For our "pre-dessert", we enjoyed a simple refreshing sorbet of muscat grapes over some cookie crumbs.
_DSC2145
I'm a huge fan of olive oil desserts, so it's no surprised that I loved our final course. We had tiny little Olive Oil Rosemary Cakes which were served with extra virgin olive oil ice cream (yum!), olive oil powder, honey comb candy, and orange gel. Pastry chef Katherine Hamilburg, who used to work at Bergamot, is extremely talented and makes exquisite desserts.

I am so inspired to go home and make some olive oil cakes and ice cream. Heck, I might even whip out my molecular gastronomy kit and try to make some olive oil powder!
_DSC2139

Overall Thoughts
We had a lovely time at 80 Thoreau. The staff was accommodating to our needs and took great care of us. They made a special virgin cocktail for Liz for the first course, and answered all her questions - everything from whether the cheese was pasteurized to the intricate methods used to make certain dishes. The food is excellent and I think chef Carolyn Johnson is doing a great job exhibiting New England's seasonal ingredients in a sophisticated yet approachable way. This is definitely one of the best meals I've had in the suburbs of Boston.

We did feel that the tasting menu moved a bit too slowly. We booked the 8:30 seating and didn't finished everything until close to 11:30PM. It's one thing to spend 3 hours enjoying a nine-course or twenty-three course menu. Five courses over three hours is most certainly on the slow side. If we weren't enjoying each others' company so much, we may have gotten a bit annoyed.  I think we were the last people to leave the restaurant.

Other than that, the entire experience was quite pleasant and I can totally see why this place is so popular. There aren't that many options in this part of the city, and 80 Thoreau captures the winning balance of excellent food, attentive service, and a warm and friendly ambiance.

80 Thoreau
80 Thoreau St
Concord, MA 01742
80 Thoreau on Urbanspoon

Monday, May 20, 2013

Puritan & Co {SNAPSHOT}

This is a {Snapshot} of Puritan & Co. The original, detailed post about the restaurant as a whole is here.

Bryan and I stopped by Puritan & Co. for the first time this year. We'd visited it a few times last winter, but it somehow fell off our radars for the first half of this year. Even though Will Gilson wasn't in the house (he was at the Nantucket Wine Festival all weekend), the rest of the staff held down the fort admirably in his absence. Service was great, the food was all very good, and we walked away wondering, "why don't we come here more often?"
_DSC2103
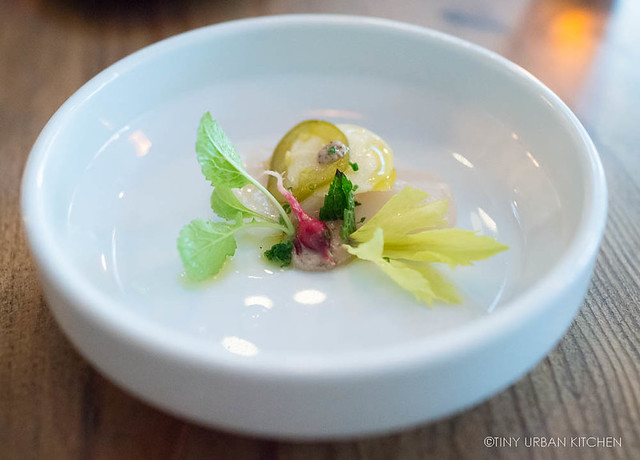
We started with the citrus marinated scallop (as an amuse bouche), and it was fantastic. The scallop was so sweet, and everything just came together very nicely in that tiny bite. I really was wishing I had actually ordered the appetizer portion of that dish.

Maybe next time.
PuritanRunnyEgg
We had a lovely starter soup that consisted of smoked pork belly, various beans, and a puree made out of . . . ramps perhaps? Alas, I cannot remember. I should have taken notes, but I did not. In any event, it was very, very good. We polished the whole thing off quite quickly. Of course, it was lovely to break that egg open and mix the yolk around with all the other flavorful elements of the dish.
_DSC2104
We also tried a Crispy Pig's Head Torchon, which is made by mixing and rolling together various parts of a pig's head (organs are removed!) such as the cheeks, skin, etc. It was a tad rich for me, but Bryan enjoyed it quite a bit.
_DSC2109 Black Pepper Pasta ($17) with dandelion greens, guanciale, and spring garlic was absolutely fantastic. I loved the bitterness of the dandelion greens (my first time trying it!) and the pungent "bite" from the garlic. The freshly made pasta was lovely as well. I would most definitely order this dish again. _DSC2111
We were flabbergasted at how "rare" the lamb was cooked (a very, very good thing) in our entree, called Lamb Three Way. It consisted of lamb belly, lamb loin, and I can't remember the third one, maybe lamb tenderloin? The entire dish was incredibly tender and not too gamey at all. I'm going to hazard a guess that it's American lamb, which has a much milder taste than New Zealand or Australian lamb. Overall, the dish was excellent, with a lovely balance of flavors from fresh, seasonal spring vegetables.

If I go back, I definitely want to order more of that citrus cured scallop, as well as the pasta.

Gosh, I love spring ingredients.

Related Posts
Puritan & Co.
Garden at the Cellar
Cooking Class with Will Gilson
Tomato Vine Tasting Tour with Will Gilson

Puritan & Co.
1166 Cambridge St
Cambridge, MA
Puritan & Company on Urbanspoon

Snapshots

_1050510-2
What happens when your blog starts pushing six years old? (I know, hard to believe! Though I guess Tiny Urban Kitchen as an entity didn't start until 2009, but still!)

You start realizing that some of your posts, especially restaurant posts, are becoming more and more outdated. Restaurants often close, completely change their menus, switch up chefs, or go uphill (or downhill) in quality.

To sort of address this (and to avoid continually writing repeat posts about restaurants I've already featured), I've decided to start a new type of post on this blog, which I'll call "Snapshots."

Snapshots won't be like my typical restaurant write-ups, which are detailed and contain all sorts of important information about the chef, menu, history, space, and various other facts. Instead, Snapshots will usually be short, photo-driven posts about a restaurant I've already discussed at length in an earlier post.

I find it's a nice way of updating you on my thoughts regarding current, seasonal menus. It will allow me to share with you many more photos of gorgeous food that, in the past, would have just lived in my computer because I thought "No need to put it on the blog because I already wrote about this restaurant." You'll see more dishes from restaurants I tend to revisit.

I'll always label "Snapshots" as such so you'll know what kind of post to expect. And don't worry, I don't plan to stop writing and just post pictures from now on. I don't intend on Snapshots taking up a huge percentage of the blog. However, I do like having more ways to share information with you whenever I find something cool from a restaurant meal I've enjoyed lately.

I'll start with my first Snapshot this week, and will plan to add more whenever I think I have something that's share-worthy.

Hope you enjoy it, and feel free to give me feedback in anyway.

Jen

Thursday, May 16, 2013

Ramps Pesto

Ramp Pesto
Perhaps I'm ignorant about food, or maybe the craze has just popped up recently, but I had never heard of ramps until about 2 years ago.

And it wasn't until last spring that I tasted ramps for the first time (at a restaurant) and proceeded to fall in love with that pungent, garlicky flavor.

And then it wasn't until this spring - just a couple weeks ago, in fact - that I finally saw them in the market. I pounced on my chance to pick up a few stalks so that I could finally, finally try cooking these gorgeous plants myself.
Ramps Fiddleheads
Ramps, also known as spring onions, wild garlic, or wild leeks, grow wild throughout the forests in Massachusetts and pretty much up and down the East Coast. These vegetables are one of the first things to pop up in the spring, and people go crazy when they appear for their short, short season.

Ramps are not really cultivated, so if you see ramps on the menu or the market, someone has gone out foraging for them. Some have expressed concern about the fanatacism surrounding ramps leading to over harvesting of the delicate plant.  In fact, Quebec has outlawed the sale of ramps since 1995, called it a "threatened" species.

I think ramps are still growing healthily in many parts of New England. However, I wouldn't be surprised if there are patches that have been picked in an unsustainable manner.

With this knowledge and understanding about ramps, I approached my first (and likely only encounter) with ramps this spring with a heightened level of appreciation and awareness.
_DSC2063
Ramps are both garlicky and "onion-y" - pungent, almost spicy, and very fragrant. I think they work super well in pesto because they act both as the green "leafy" agent and the strongly flavored "garlicky" agent.

I always hated peeling all those garlic cloves when making traditional basil pesto, so this saves a previously annoying step!
_DSC2066
Making ramp pesto is super easy and there's really no "exact" recipe. Essentially, you need ramps, some sort of nuts, some sort of hard, salty cheese (grated, please), and oil. As for nuts, try using toasted walnuts, pistachios, hazelnuts, or almonds. You could also use pine nuts, the traditional nut used in basil pesto.

And that's it!

Throw everything into a food processor except the oil. Give it a whirl until you have a chunky puree.

Turn the machine back on and start adding the oil in a stream. Add enough until you are happy with the consistency.
Ramp Pesto
You want a smooth paste.

The whole process takes all of 2 minutes, really.

Taste test it, though. You can add a bit of salt if you think it needs it (it all depends on how salty your cheese was). Alternatively, you could add more cheese too if you so desire. It's really up to you.

Once you're satisfied with the flavor of the pesto, you can do all sorts of things with it. You can freeze a portion of it for later use. You can throw a dollop of it in soup (yum!). You can eat it with bread, or you can serve it with pasta!
Ramp Pesto
You can see what I chose to do. I eye-balled the whole thing and didn't really measure exactly. I just added enough pesto so that it nicely covered all the pasta I had made. If you have leftover pesto, you can always freeze the rest and eat it with crostini or a tomato mozzarella salad.

In my case, there was quite a bit of pesto (compared to pasta). I don't mind a saucier pasta at all, so I threw it all in. It's your call.

Enjoy!
_DSC2074

Ramps Pesto
Serves about 2

1 bunch of ramps (see my photo below, maybe 10 small stalks?)
1/2 cup Parmesan cheese, finely grated
1/2 cup nuts (many recipes use walnuts or pistachios; I had marcona almonds on hand, which worked fine)
~1/3 cup olive oil, give or take
optionally salt
1 lb fresh pasta
Ramps Fiddleheads

Tuesday, May 14, 2013

Tab Tim Grob (Rubies in Coconut Milk)

_DSC1419
This is the final of four dishes that I learned to make during my 4-hour cooking class at BaiPai Cooking School in Bangkok, Thailand. This is a mini-series that's part of a larger Thailand! travel series of my eats in Bangkok. Scroll to the bottom of the post to see all the posts in this series.

These changes in the weather lately are driving me crazy.

The teasing few days of warm weather we had last week (high of 80° F!!) flipped a switch within me. All of a sudden, I was decidedly done with winter. Over the weekend, I grabbed all my down jackets and wool coats and put then into storage. Same with the boots and winter gear.

Yesterday morning I walked out in a thin jacket and a short sleeved shirt, only to turn right around after walking outside in order to grab a warmer jacket.

But warm days are coming very soon. And before we know it, we'll be longing for relief from the hot weather.

On that note, we end our Thai cooking school series with one of my favorites. It's a dessert that's perfect for times when it's really hot outside. Served over ice, Tab Tim Grob is extremely refreshing and cool. The bright colors also make me think of summer.
_DSC1416-2  "Tab tim" means rubies or pomegranate and "grob" means crunchy.

These gorgeously colorful "jewels" do indeed resemble pomegranate seeds in some way. Water chestnuts are covered in an ever-so-thin dusting of tapioca flour and then boiled briefly. What results is a perfect "seed" with a slightly crunchy center and a soft, clear outer layer.

I had never heard of this dessert before coming to Thailand. By the time I left Thailand, I was convinced it was one of my new favorite desserts from the country.
_X1C4457

How to Make Rubies
Cut up water chestnuts into small cubes. If you are using the canned variety, soak them in water for 10 minutes first before soaking. Soak the water chestnut pieces in red grenadine or red cordial. You can also use dark red juices or red food coloring. [Please note that this step is merely for show. The color will not affect the flavor, and therefore if you don't want to use coloring, you can skip this step. [You can also use other colored cordials or food coloring, but then maybe you'll have to change the name to "emerald" or "sapphires" in coconut milk!].

While waiting for the water chestnuts to turn red, make your syrup and coconut mixture. Both are pretty easy to make. For the syrup, just bring sugar, water, and pandanus leaves to a boil over low heat. Let simmer for 15 minutes (no need to stir).

Note: this syrup can last for up to one month in the refrigerator if you want to make a larger batch.
_X1C4413
To make the coconut milk mixture, boil coconut milk and water together in a pot over medium heat. Keep stirring to prevent the oil from separately out of the coconut milk. You can optionally add pandanus leaves to the coconut milk as well if you want that flavor. Set aside once everything is melted and well mixed/incorporated.
WaterChestnutRubies.jpg
After the water chestnuts have been soaking for one hour, they should nicely bright and red. You are ready to cook the "rubies"! Toss the soaked water chestnuts in tapioca flour until they are completely covered. Remove the powdered water chestnuts from the tapioca flour, shaking to remove excess flour.
_DSC1380.jpg
Bring a pot of about 2 cups of water to a boil. Add the water chestnuts and count to 10. Stir once and wait until the water returns to a boil and the water chestnuts float to the top (about 20 seconds). Using a slotted spoon, remove the water chestnuts and dunk them into an ice bath.
_X1C4458.jpg
Once you're ready to serve, drain the water chestnuts well with a slotted spoon, and place them in the bottom of a dessert bowl. Add syrup, coconut mixture, and crushed ice.

Tasting Time!
I fell head over heels in love with this dessert. The water chestnuts have this really unique texture where they are soft and chewy on the outside yet slightly crunchy on the inside. The sweet-salty combo from the slightly salty coconut milk base and the sweet pandan-infused syrup is seriously addictive. Even though I was beyond stuffed from an afternoon of eating Golden BagsLarb Gai, and Pad Thai, and I still polished off my entire bowl of this refreshingly delicious dessert.

Throughout the rest of my short trip in Thailand, I desperately sought this out at restaurants.

I can't wait to make it at home again!
_DSC1417.jpg


Tim Tab Grob (Rubies in Coconut Milk)

Water Chestnuts
30g peeled water chestnuts, boiled and diced
2 T red grenadine or cordial (or food coloring)
2 T tapioca flour

Syrup
1/2 cup sugar
1/4 cup water
1-2 Pandanus leaves
(or 1-2 drops Pandan extract)

Coconut Milk
1/2 cup coconut milk
1/2 tsp salt

Soak water chestnuts in grenadine for 1 hour.  If you are using canned water chestnuts, soak them in water for 10 minutes first before putting them in the red coloring liquid.

Meanwhile, heat the sugar, water, and pandanus leaves (torn to release flavor) into a saucepan. Bring to a boil over low heat and then let it simmer for 15 minutes.

In a separate saucepan, heat coconut milk and salt (and optionally torn pandanus leaves) to a boil. Continue stirring to prevent the coconut oil from separating out. Set aside.

After 1 hour, transfer red water chestnuts into tapioca flour and toss with flour until well covered. Bring 2 cups of water to a boil and add the water chestnuts, cooking for 10 seconds. Stir and wait until the water boils again and the water chestnuts float to the top. Transfer to a bowl of ice water to stop the cooking process.

To serve, combine water chestnuts, syrup, and coconut mixture in a bowl and add crush ice. The amounts are flexible. Taste it and add more or less depending on how sweet you want it to be.

Enjoy!

This is the sixteenth post in the Thailand! travel series of my eats in Bangkok. Other posts include:

Eats!
Thip Samai, Best Pad Thai in Bangkok?
Raan Jay Fai, Best Drunken Noodle in Bangkok
Street Foods of Bangkok, Part I
Street Foods of Bangkok, Part II
Fun Fruits in Thailand 

Cool Experiences
Maeklong Railway Market
Floating Markets (Damnoen Saduak)

Cooking Classes + Recipes
Somphong Thai Cooking School 
Som Tam (Papaya Salad)
Thai Panaeng Curry Chicken
Bananas In Golden Syrup
BaiPai Thai Cooking School
Golden Bags
Larb Gai (Laap Gai)
Pad Thai

Monday, May 13, 2013

Pad Thai (Phat Thai)

_DSC1354
This is the third of four dishes that I learned to make during my 4-hour cooking class at BaiPai Cooking School in Bangkok, Thailand. I also learned how to make this at my cooking class at Somphong Thai Cooking SchoolThis is a mini-series that's part of a larger Thailand! travel series of my eats in Bangkok. Scroll to the bottom of the post to see other posts in this series.

It was one of the first things I asked during our cooking class in Bangkok.

"Do Thai people eat Pad Thai a lot?"

It's such a common dish here in the U.S. We see it in every Thai restaurant, from the cheap chains to the higher end ones. We even see it in Chinese restaurants sometimes. Do Thai people actually eat this dish? Or is it like the Thai version of "Chinese" crab rangoons, chop suey, and egg foo young?

Without hesitation, our instructor Nok replied, "Absolutely. I love this dish and eat it all the time. We bring it to potlucks, we eat it on the street, we make it at home. It is probably the dish we eat the most."

I learned how to make this dish twice while in Thailand. Both cooking classes offered it as one of the four courses. I also ate it numerous times while I was in Thailand.

I quickly learned that Pad Thai in Thailand is quite different from the Pad Thai in the US. I was surprised how similar the recipes from the two classes were (virtually identical), and how different (and so much better!) these were compared to the Pad Thai I'd eaten in America.
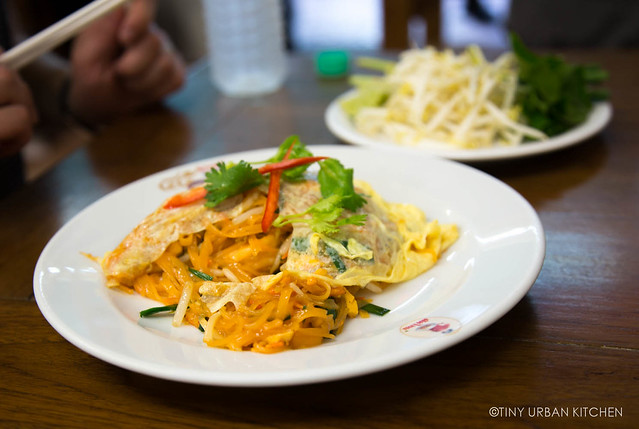
_X1C4314.jpgPad Thai from Thip Samai, arguably one of the best Pad Thai places in Bangkok

There are several ingredients in authentic Bangkok street pad Thai that I don't typically see in my local US Thai restaurant: Chinese chives (or garlic chives), dried tofu (or bean curd), and salted turnips. Tamarind is also an essential ingredient that's used in the sauce base. Many recipes use lime juice or vinegar as a substitute, which really creates an all-together different tasting beast.
_DSC1339
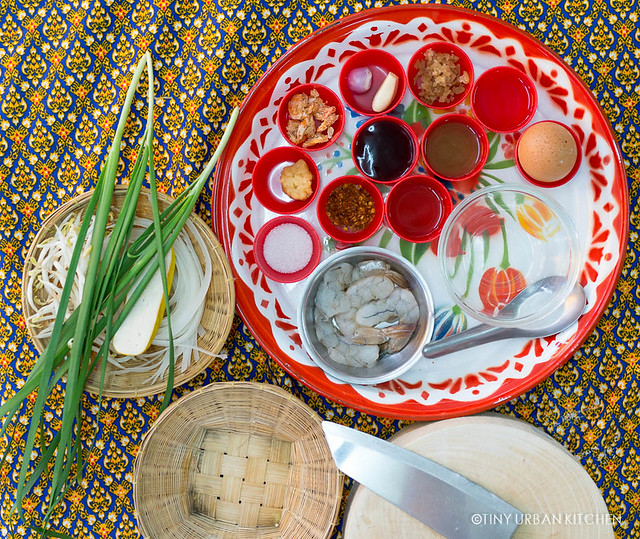
Pad Thai is one of those dishes where it's really important to make sure you have all your mis en place perfectly ready to go. There is a sizable amount of prep, but the actual cooking is fast, and if you're not ready with your ingredients, you could easily mess up the execution.
_X1C4428
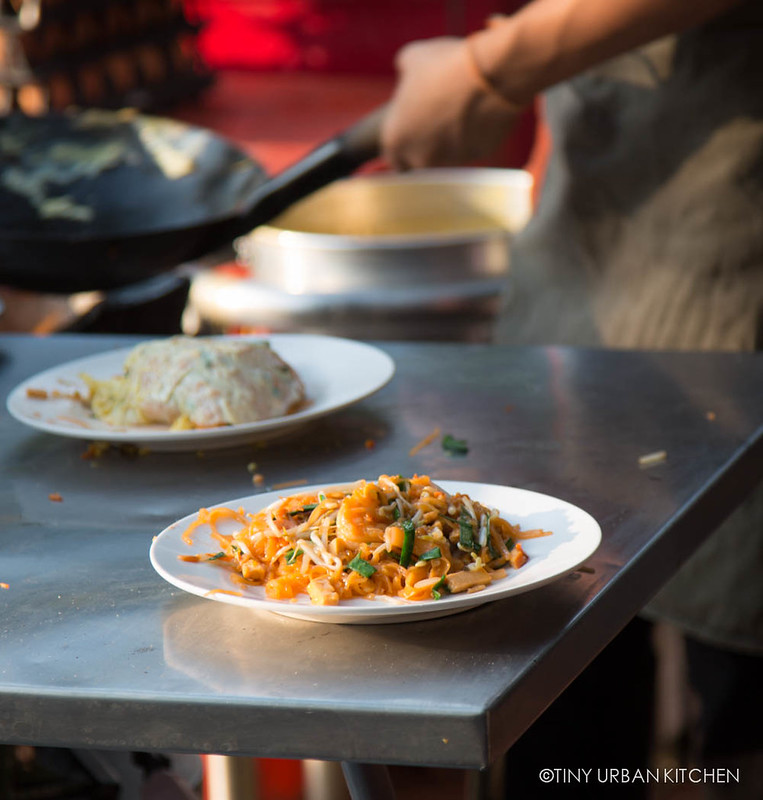
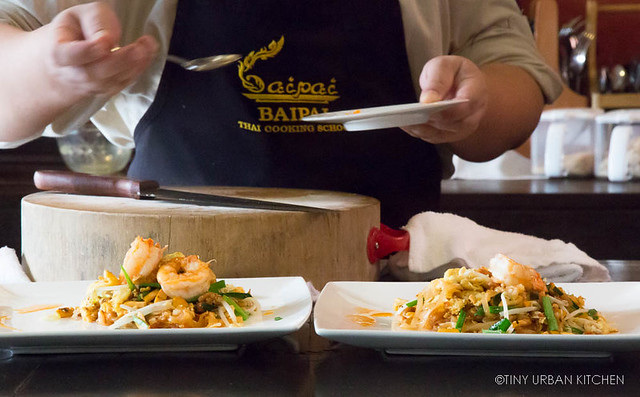
Here Koy from Somphong Cooking School demonstrates to a class of interested students just how quick the whole process is.
_DSC1340
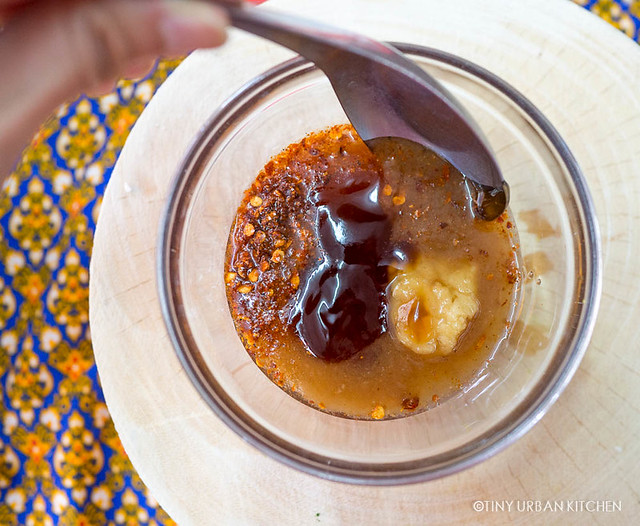
Once you've made sure to chop, dice, de-vein, and soak all necessary ingredients, make your sauce. It's pretty simple - just mix together chili powder, palm sugar, white sugar, fish sauce, tamarind juice (or tamarind paste + vinegar), and (optionally) oyster sauce. I say optionally because oyster sauce was present in one cooking school's recipe but not the other one.

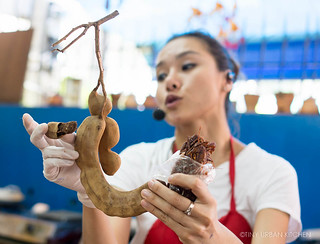
Just a side note about tamarind. Tamarind is a pod-like fruit grown in tropical areas (see left photo below). It's got a very tart flavor and i9s often used in Thai recipes.
_DSC1323_DSC1322
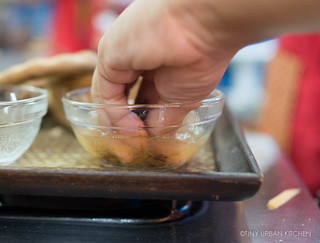
In Thailand, we bought fresh "wet" tamarind from the market (what she's holding in her left hand). Typically, you take this pulp, add it to hot water, and mash it up with your hands (see photo on right). After letting it steep for awhile, you can strain it and use the tamarind juice. I did a bit of searching, and it looks like you can purchase wet tamarind online if you can't find it in your market (though I'm pretty sure I've seen at least tamarind pods at Asian markets).

If you want to take a short cut, you can purchase tamarind paste in a jar. In this case, you can use the paste directly. In our recipe, we "diluted" the paste up with some added vinegar.
PadThai1
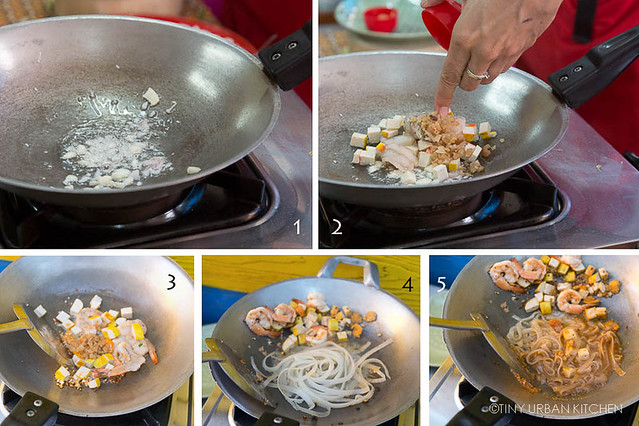
Once you're pretty certain you've got everything ready to go, it's time to get started!

(1) Add the aromatics (garlic, shallots) to your wok and heat until fragrant.

(2) Add the dried bean curd, salted radish, and shrimp and

(3) stir fry until the shrimp is cooked.

(4) Push the shrimp aside (or safer yet, remove the shrimp from the wok), and add the noodles and water (or stock). Stir fry until noodles are soft.

(5) Add the pad Thai sauce that you just made and stir well, allowing the noodles to absorb the liquid.
_DSC1344
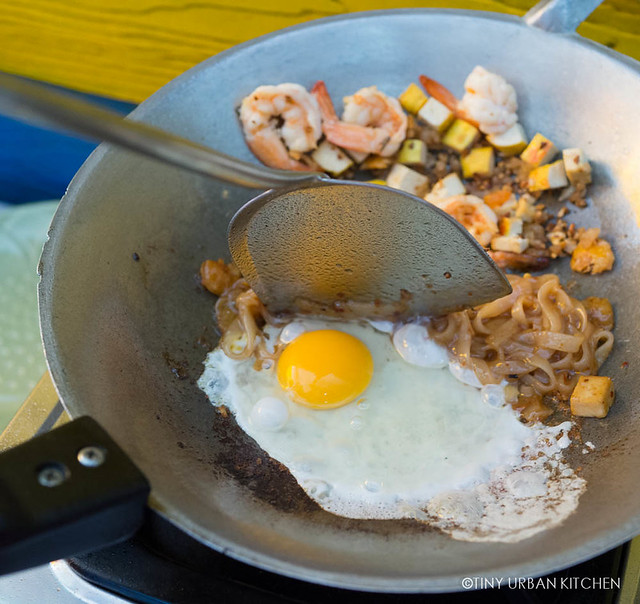
Now push everything aside to make room to fry the egg!

There are two options for what you can do with the egg. You can either break it up like the traditional way and mix it throughout. Or you can make it into a thin omelette with the pad Thai inside. Below I've shown both methods.

Traditional
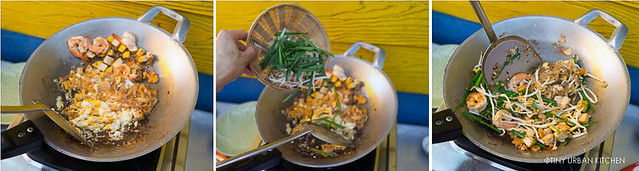
PadThai2
Scramble the eggs inside the wok, breaking up the egg into small pieces. Add the Chinese chives and bean sprouts and stir everything together until cooked.
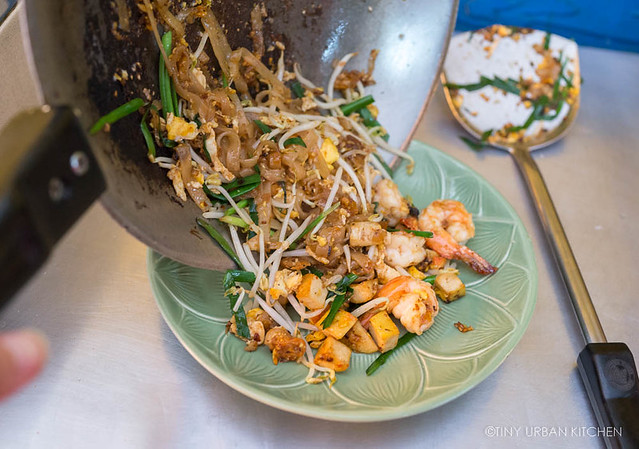
_DSC1348
Transfer to a serving dish (yum!).
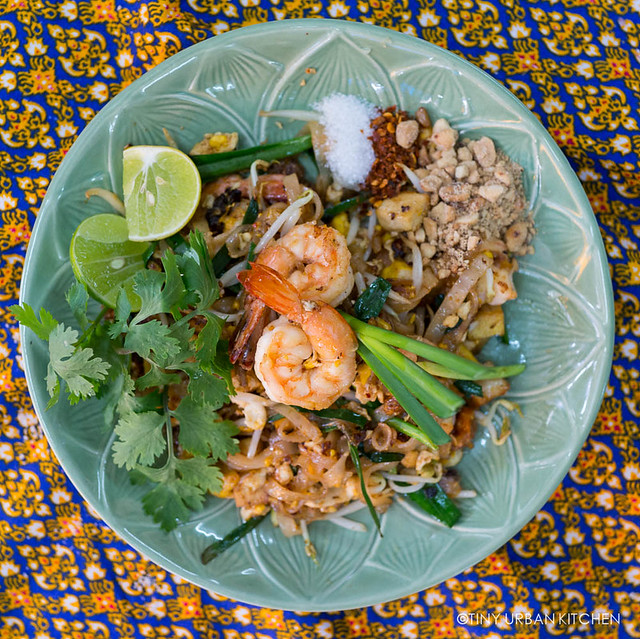
_DSC1352
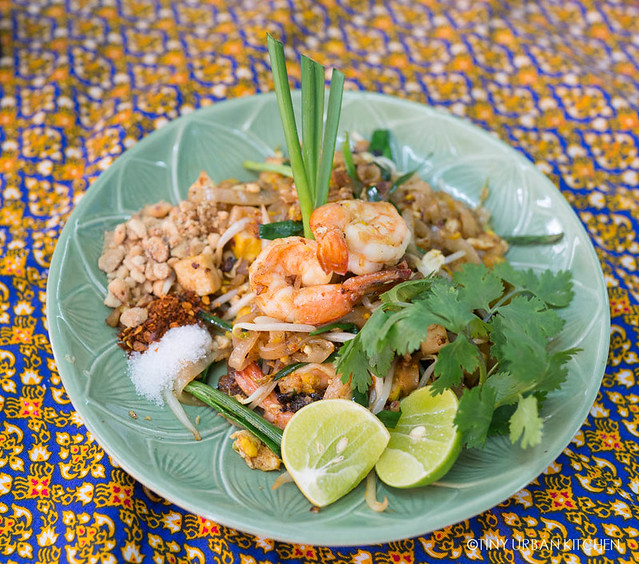
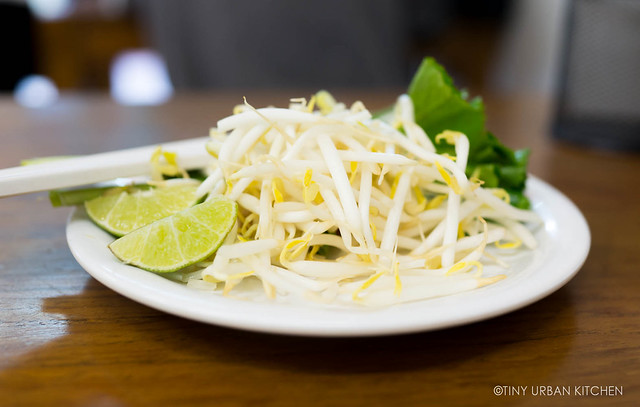
For decorative purposes, place the shrimp on top. Around the plate, add chopped cilantro, lime wedges, and a small spoonful each of sugar, chili powder, and peanuts. These three accompaniments allow diners to choose how sweet, spicy, or "peanuty" they want to make their Pad Thai.

Omelette
_X1C4318.jpg
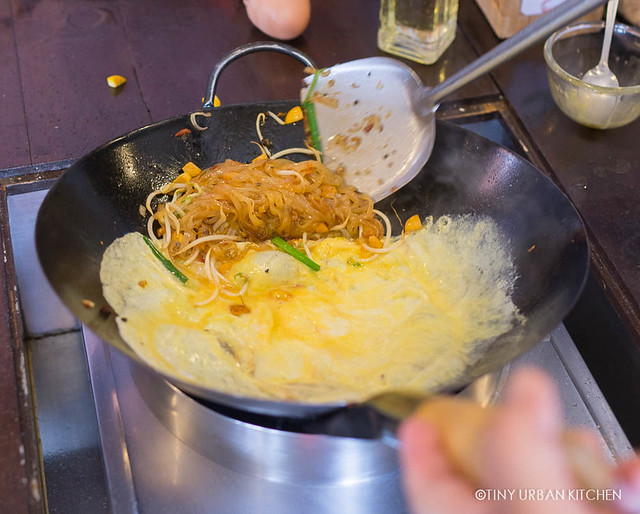
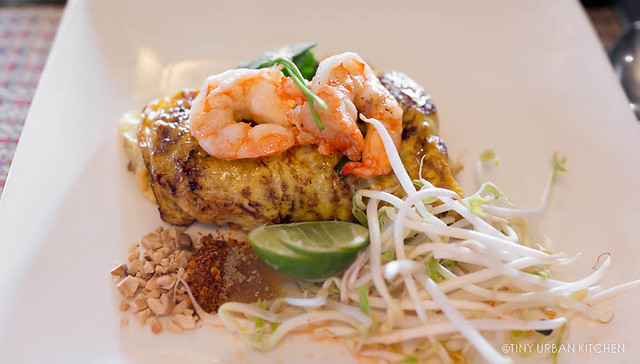
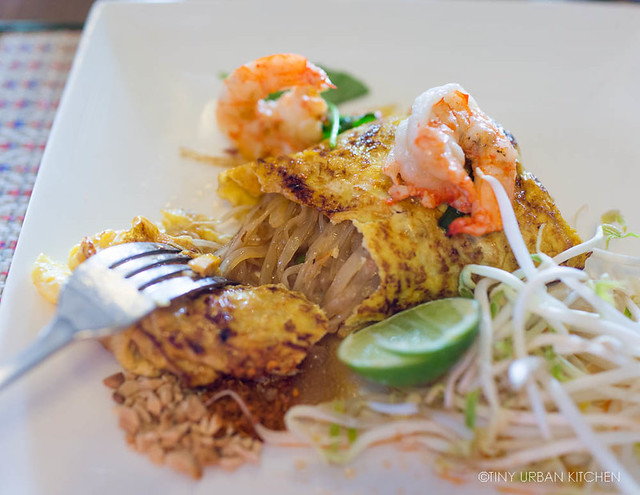
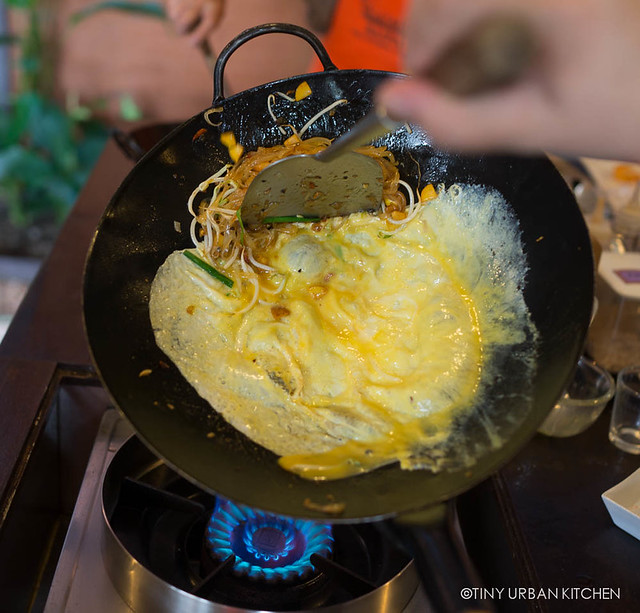
The omelette method takes the egg portion of the Pad Thai and wraps it around the Pad Thai noodles.  This technique takes more skill, since it requires you to make a super thin omelette on the wok and then successfully wrap it around the noodles without it breaking!
_DSC1410
First, you will need to add the Chinese chives and bean sprouts to the noodle mixture and stir fry until cooked. Once the noodles are done, push the cooked noodles to the side of the wok and add one egg (already beaten). Spread it out on the wok as thinly as possible by picking up the wok and turning it, using gravity to spread the egg.
_DSC1411
Once the egg is cooked, wrap it around the Pad Thai like a burrito. This is most easily done by rolling the noodle pile (which you have tried to mold into the shape of your final product) back over the egg sheet, and then wrapping the edges around. This obviously takes some skill. If it's your first time making pad Thai, I might recommend trying the normal version first!
_DSC1412
Serve with the same accompaniments (peanuts, chili, sugar, limes), but on the side.
_DSC1415
Yum!
_X1C4482

A few notes
I learned how to make this dish twice from two different cooking schools. Although most aspects of the recipes were very, very similar, there were a few difference that highlight parts of the recipe that are probably flexible.

1. Aromatics: one recipe used just shallots while another one used garlic and shallots. My guess is that either works, and you may even be able to substitute onions or even scallions if you in a bind.

2. Pad Thai Sauce: one recipe included oyster sauce while another did not. Traditionally, tamarind is used to contribute tartness to the recipe. This can come in different forms, such as tamarind juice or tamarind paste. At the first school, tamarind juice was used. At thesecond cooking school, tamarind paste was used, but then vinegar was also added, perhaps to give it some liquid and tartness?

3. Technique: As I mentioned before, this dish moves quickly. Our teacher at Somphong was skilled, and therefore was able to make everything in one pot by just quickly pushing stuff to the edge of the wok. At BaiPai, they recommended removing the shrimp at the beginning of the cooking process and then adding it back in later. For us less experienced cooks, I think that's a good idea because overcooked shrimp does not taste good at all.

4. The Wok: Though both classes used a simple wok to make this dish, some had said that a flat bottom pan is easier because it allows you to push parts of the dish aside without having them fall back into the pan. In Thailand, it seems like the most famous street vendors use a traditional wok, and they always just make the dishes to order. This is not a great dish to make in bulk.

I was thrilled to discover how accessible this dish was. I think the hardest part is obtaining all the authentic ingredients. In Thailand, we were able to get fresh tamarind and fresh rice noodles, which are harder to access in a normal supermarket here in the US.

I think most of these ingredients are available in Asian supermarkets, so I'm really excited to try making this soon at home in the US. I'll let you know how it goes!
_DSC1236.jpg

Pad Thai
serves 1

Ingredients
1 T cooking oil
1/2 T minced garlic
1/2 T minced shallots
4-6 shrimp, shelled and deveined
1 T salted Chinese radish, chopped
1 T dried shrimp
1 T dried bean curd, cut into cubes

1 cup rice noodles (if using dried, soak in hot water first until soft)
1 T water
Pad Thai Sauce (see below)
1 egg

1/2 cup Chinese chives (cut into 2 cm strips)
1/2 cup bean sprouts

Accompaniments
2 T roasted peanuts, crushed
1 bunch of cilantro, chopped
1 lime, cut into wedges
1 tsp chili powder
1tsp sugar

Pad Thai Sauce
1 tsp chili powder
1/2 T white sugar
1/2 T palm sugar
1 T fish sauce
1 T tamarind juice or [4 tsp tamarind paste + 1 tsp vinegar]
1 T oyster sauce (optional)

If the rice noodles are dry, soak them in hot water for about 20 minutes until soft. Meanwhile, prepare the Pad Thai sauce by mixing together all of the ingredients in a small cup. Set aside.

In a wok over medium heat, cook garlic and shallots until fragrant, about 2-3 minutes. Add the shrimp, salted Chinese radish, dried shrimp and dried bean curd. Stir fry until prawns are cooked.

Add the noodles and the water and cook until the noodles are soft.

Ad the Pad Thai sauce and mix well. Cook until the sauce is no longer liquidy.

Push the noodles to one side and add an egg.

Traditional Method: if you want to mix the egg up, scramble the egg and cook it. Once it's done, add the bean sprouts and Chinese chives. Stir everything together until cooked.

Transfer to a serving dish, and garnish with accompaniments such as cut lime wedges, sugar, chili powder, crushed peanuts, and cilantro.

Serve!
_DSC1354
This is the fiftheenth post in the Thailand! travel series of my eats in Bangkok. Other posts include:

Eats!
Thip Samai, Best Pad Thai in Bangkok?
Raan Jay Fai, Best Drunken Noodle in Bangkok
Street Foods of Bangkok, Part I
Street Foods of Bangkok, Part II
Fun Fruits in Thailand 

Cool Experiences
Maeklong Railway Market
Floating Markets (Damnoen Saduak)

Cooking Classes + Recipes
Somphong Thai Cooking School 
Som Tam (Papaya Salad)
Thai Panaeng Curry Chicken
Bananas In Golden Syrup
BaiPai Thai Cooking School
Golden Bags
Larb Gail (Laap Gai)