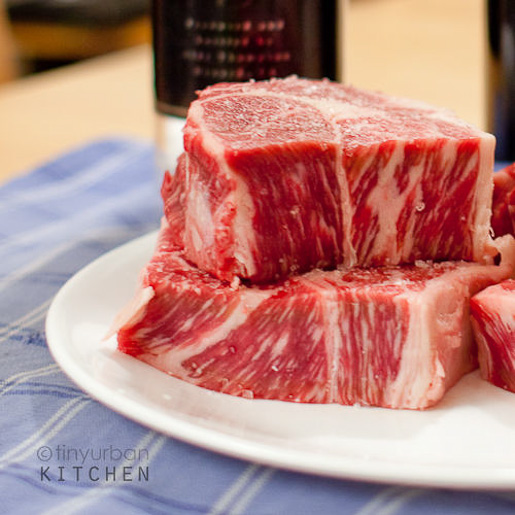
A funny side effect of the recession is that we have been eating more high quality steak at home. With the downturn in the economy, steak wholesalers are unable to sell all of their prime beef to restaurants. This is why we have been seeing prime beef at Costco lately - for $9.99 a pound, no less! On Friday night, we enjoyed two 16-oz prime rib-eye steaks (perfectly seared!), a lovely bottle of 2007 cabernet from Concha Y Toro (Chile), and some
spinach salad all for under $40 total. This meal would have easily cost close to $200 at a nice steak house.
As a person with a tiny urban kitchen, I was really looking for a way to make restaurant quality seared steaks without causing so much smoke that I would set off various building-wide fire alarms (ahem . . I learned the HARD way from past experience).
I found this great method in Cook's Illustrated May 2007 issue. Unlike most methods, you bake the steaks at low heat for 30 minutes
before searing them on a cast-iron grill pan. The resulting steak is amazingly tender and juicy, very nicely and evenly browned, and does not cause as much smoke as the traditional method. I'm sold.
You can use strip steaks, rib-eye, or filet mignon with this method. If you are using filet mignon, buy a 2 pound center cut tenderloin roast and cut it into four 8-oz steaks.
For a printable version of this recipe, click
here.
Ingredients2-rib-eye steaks (1 1/2 to 1 3/4 inches thick)
Kosher salt and ground black pepper
1 T vegetable oil
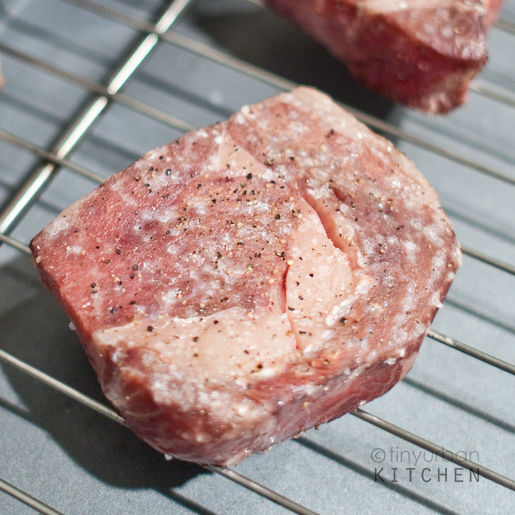
Step 1: Preheat oven to 275 degrees and adjust oven rack to middle position. Dry the steaks with a paper towel and cut the 16-oz steaks in half to make 2 8-oz steaks (still same thickness!). Generously sprinkle the steaks on both sides with sea salt and pepper. (Ideally the steaks would be at or close to room temperature)
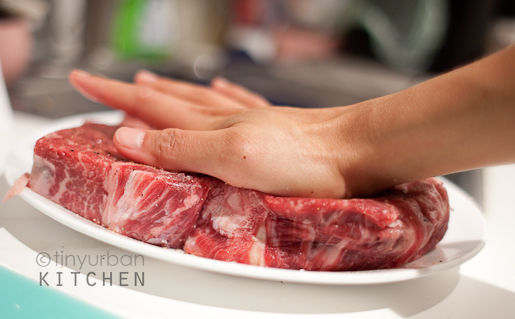
Step 2: If the steaks are not even thicknesses, try to press down on the thicker steaks to bring all the steaks to a uniform thickness, if possible.
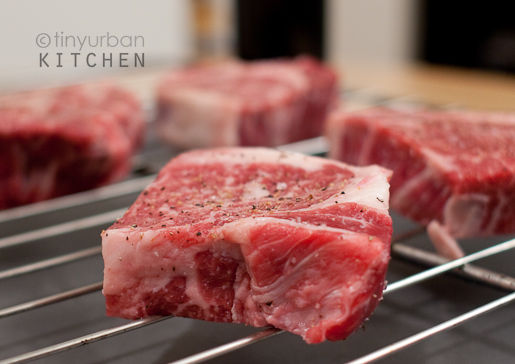
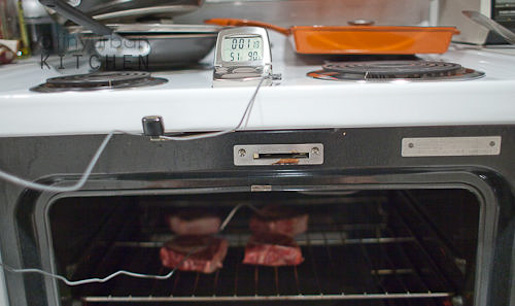
Step 3: Put the steaks on a wired rack set in a rimmed baking sheet. Since I did not have a wired rack, I just cleaned one of my oven racks, placed the steaks directly on top, and put a rimmed cookie sheet right below the rack with the steaks to collect any drippings.
Step 4: Bake the steaks at 275 degrees until they reach an internal temperature of 90-95 degrees (rare or medium rare) or 100-105 degrees (medium). It took my steaks about 14 minutes to reach 90 degrees (it started at around 50 degrees).
This slow baking at a low temperature allows enzymes in the meat (cathepsins) to break down connective fibers, making the meat super tender. It's sort of like dry aging at turbo speeds in the oven. This enzyme only works at temperatures below 140 degrees, which is why hot broiling the steaks for a short amount of time does not cause this tenderizing effect. In our case, we have slowly baked and "aged" the steak in the oven under low heat for 15 minutes (or longer, if you like medium steaks!)
You can use an instant read thermometer. I used this cool thermometer which beeps at you when your desired temperature is reached. You stick the probe in the meat and then the unit sits outside. I picked up this Taylor one at Target for only $20 (the one at Williams-Sonoma was $50!). It worked like a charm.
When you take the steaks out, they will look a little scary, but don't worry! We will sear them and then they will be beautiful!
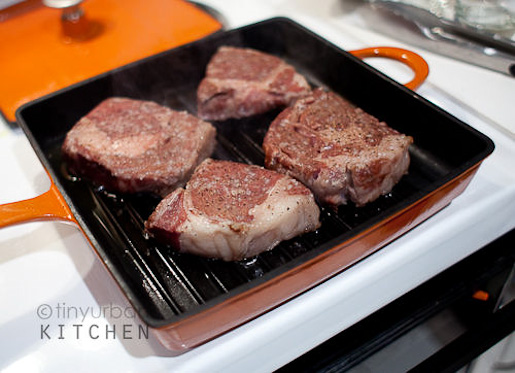
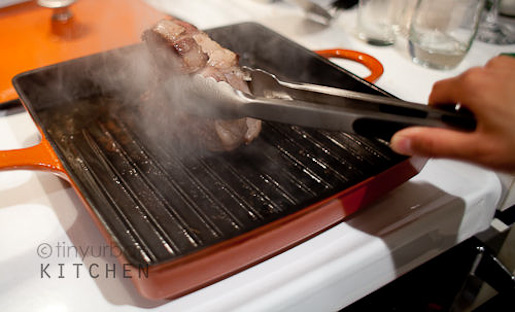
Step 5: Heat your cast-iron grill pan (or aluminum grill pan) to high heat with vegetable oil until the oil is smoking. Quickly put the steaks onto the grill. Cook for 1.5 - 2 minutes on one side (lifting the steak halfway to re-distribute the fat), and then flip and cook another 2 - 2.5 min on the other side. Warning, this is where there will be smoke. Open windows and vent as necessary!
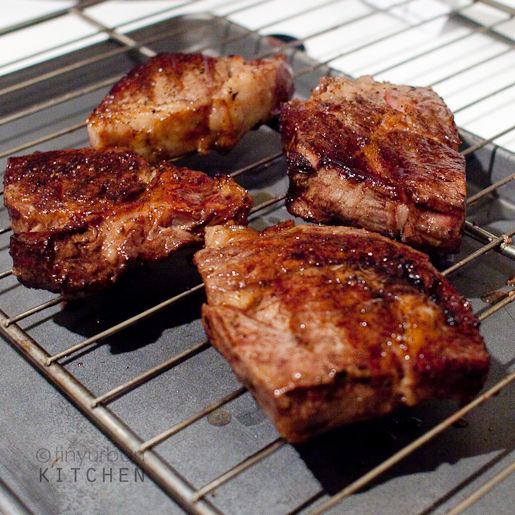
Step 6: Let steaks rest on rack while you do the next step.
Step 7: Pick up two steaks, put them side by side with tongs, and sear all sides of the steak to lock in the juices!
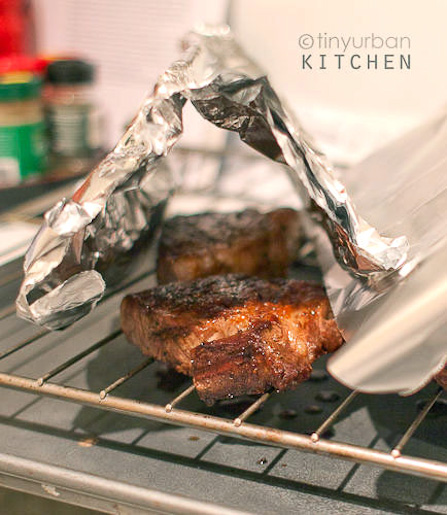
Step 8: Let the steaks rest for 10 minutes loosely tented with foil (important! don't eat them right away!)
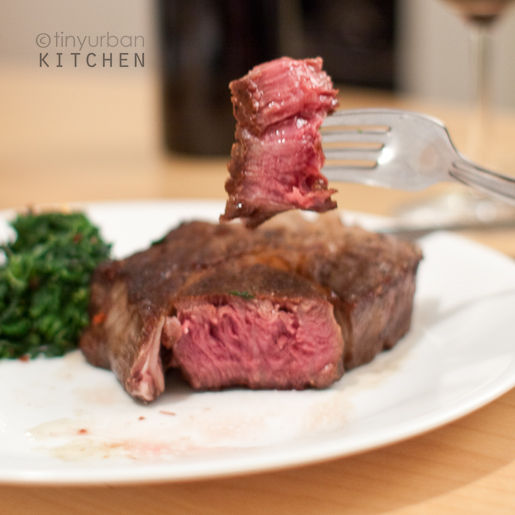
Step 9: Serve!
This is now my preferred method for making steaks at home. Although it's by no means smoke-free, it does create less smoke than our old method, which was to sear the whole steak on a grill pan on top of the stove. By opening the windows and turning on the vents, we were able to clear out most of the smoke relatively quickly. And the steak that you get at the end of the endeavor is TOTALLY worth it.
No fire alarms were set off in the making of this blog post. :)

Great techniques...thanks
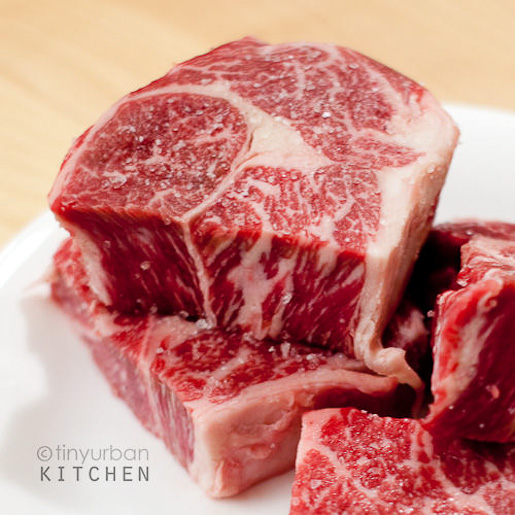
ReplyDeleteWow, those cuts of steaks look gorgeous. Beautiful marble pattern of the fat. Buttery, delicious goodness!
ReplyDeleteThose look amazing! Thanks for the tip!
ReplyDeleteLooks sooo good. Could you briefly explain the beef rating system? Also, where did you get your template? I want to put a menu bar up top like that.
ReplyDeleteSurprisingly great marbling on those steaks! Always thought wholesalers didn't carry the best quality of beef but I guess I was wrong!
ReplyDeleteWow, awesome post. Thanks for posting this method, I never would have thought to roast steaks and then sear. Great photos too...
ReplyDeleteBrilliant post. I love stake, and i think you've just made it even better!
ReplyDeleteQuick Q though, i'm assuming those temps are In Fahrenheit? We work off Centigrade across the pond so just checking.
Thanks!
Livia - the template is at the bottom of the blog, I think it's called Wild Birds by ourblogtemplate.com
ReplyDeleteBeef is rated based on marbling and age. Younger & more marbled is better because it yields a more juicy and flavorful steak. Prime is best(only 2% of all beef is rated so highly), choice is next, and select is third. Lower grades are used in processed foods (frozen burritos, hamburgers, and the like).
Snikt - yes, these temperatures are in fahrenheit.
From someone who has set off the fire alarm at least 5 times in the last 2 months in our new apartment, this was a great read! I think I will try this with some steaks we have later in the week. Great post! :)
ReplyDeleteYou get even less smoke if you don't heat the oil in the pan but instead brush the oil directly on to the steak. Obviously this works only in a griddle pan.
ReplyDeleteAnonymous - thanks for the tip! Maybe I'll try that next time and see if it works. I have both cast iron and griddle pan. Maybe I can do a cook-off of the two methods. :)
ReplyDeleteJust tried this method last night after reading about it, but instead of leaving them in there at 275, I lowered it to 200 and left my ribeye steaks in there for about a half hour before I pan seared them, since I had a lot of time before my guests were coming over. I didn't let them get pink on the outside like in the post, but they came out AMAZINGLY delicious and tender. And it had the crispiest fat ever on the edge. Delicious, and I'll never make my steaks any other way again!
ReplyDeleteAva - thanks so much for sharing that tidbit! I guess it makes sense, the longer it sits in that low temperature, the longer the enzymes can break down those fibers resulting in ULTRA tender meat. YUM!!
ReplyDeleteAll I can say is I won the title of House Cheff just by doing this. All in all it was 6 people at 80 bucks in meat. Plus there's no price for so many compliments. ;)
ReplyDeleteWhat beautifully marbled steaks and such an interesting technique. I'm going to share this with my hubby so that he can try it next time. Thanks!
ReplyDeleteI used this method for the second time tonight. The first was 2 weeks ago with a stove-top grill pan, tonight was skillet seared. Each time was a delicious success!
ReplyDeleteThe grill pan caused a bit more smoke than the skillet, but they cooked to exactly my desired temperature and I don't think I'll ever go back to cooking steaks any other way from now on!
OMG! I just tried the method...i went to my favorite butcher and bought one 2+weeks aged ribeye and one porter house...and using your method not only did my steaks come out perfect! it is also less messy then my previous attempts!!!! thank you so much.
ReplyDeleteI don't usually eat a lot of red meat either, but after (re)reading this post again, I really want some steak now!
ReplyDeleteEverything about this is fantastic. Your photos, your description and your advice is so, so helpful. I loved this so much I shared it with my readers at www.steak-enthusiast.com.
ReplyDeleteThanks and keep up the great work!
Mine didn't come out nearly as lovely as yours (at least on the inside). I think it's mostly fault on my part -- my steaks had been in the freezer for a while, they were much thinner than these, and I have trouble cooking on a stovetop (I burn EVERYTHING)
ReplyDeleteI may have to repeat the experiment with my resident steak buff, hopefully he can do a better job!
Cait - sorry to hear that your steak didn't turn out. Yeah, I think it helps A LOT to have thick steaks. Also make sure the steaks are fully defrosted as well! Best of luck next time!
ReplyDeleteGreat tip! I also have a tiny (windowless) urban kitchen and love using a grill pan but hate the smoke situation. I'll definitely be trying this next time.
ReplyDeleteTried this technique last night with a huge piece of bone-in rib eye last night. It was amazing! Thanks for sharing :)
ReplyDeleteAwesome! I've never tried it with bone-in. Glad to hear that it worked! I've been messing around with sous-vide lately, but if I ever start feeling bad about cooking in plastic (and I do sometimes wonder about it), I'll definitely come back to this method. :) Happy steak eating!
ReplyDeleteI tried this method two days ago.
ReplyDeleteOMG they were fabulous!
Some of the BEST meat I have ever had , and it was just super market steaks , today I am trying it with real steaks.
That's fantastic! Thanks for sharing. I'm sure your "real" steaks will turn out even more amazing.
ReplyDelete