
This dessert is part of a larger meal "A Taste of Autumn" where every single dish was made using "edible" or natural "bowls." That post is my entry for Project Food Blog Round 6. You can check out the post and vote for me here.
I'm not a baker.
Bakers are precise, careful, planned, and detail-oriented people. They have to be this way, for baking is such a precise art. Change the ratios of something, and the whole thing could totally fail.
I'm more of a throw-it-all-together-without-measuring type cook, which can often lead to failures if you're trying to get cake to be a certain texture, a crust to be flaky, or dough to rise properly.
This was my first time ever making any pie from scratch. As a non-exact imprecise sort of cook, you would naturally assume the odds would be stacked against me. Thankfully, the pie turned out great, mostly due to some interesting techniques and also flexibility in the recipe (and maybe beginner's luck!).
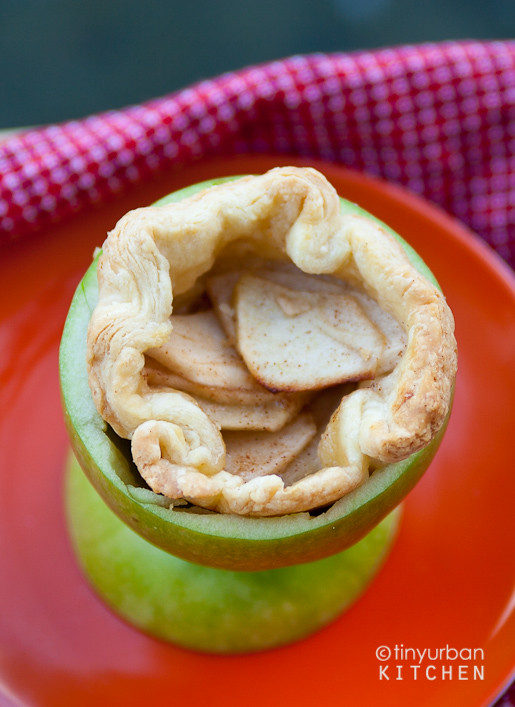
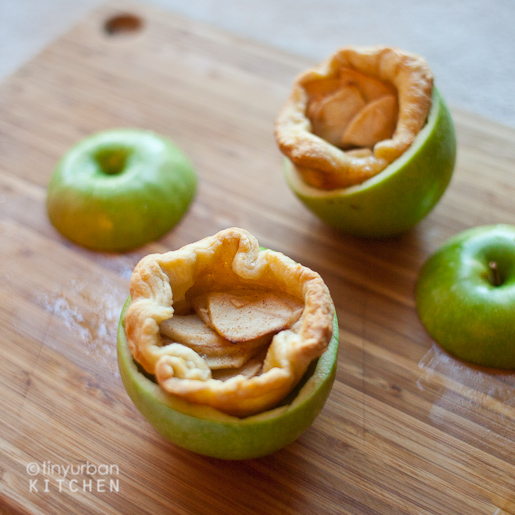
This recipe is a twist on the traditional apple pie because it's sort of an inverted apple pie. For starters, there's apple on the outside and crust on the inside. There's ALSO more apples and cinnamon on the inside too, so it's more than just inverted. It's really really confused.
The Crust
Your goal in a pie crust is to make a flaky crust. This is achieved by making pie dough that still has visible bits of butter spread throughout. When this butter melts, it creates all those lovely layers in the pastry!
The key is to use really cold butter - like frozen butter. I used this great recipe from Simply Recipes. What I like about Elise's technique is that you pre-cut the butter into 1/2 inch chunks and freeze them (I think I had it in the freezer for close to an hour). You then pulse the cold butter with flour, salt, and sugar just enough for the butter to be reasonably cut up. Start adding ice cold water, 1 T at a time until the mixture is just sticky enough that the clumps will hold together when you pinch it (about 7-8 T).
At this point you use your hands and try to form a ball with the mixture. Knead just a few times before dividing the dough in two and rolling out two pretty thick disc (about 3/4 inch thick). Wrap in plastic wrap and put in refrigerator for at least an hour but up to two days (I waited overnight).

The next day (or, an hour later), roll out the dough until it's about 1/8 inch thick. Cut out little circles about 4 inches in diameter. [of course, I didn't measure - I just sort of guessed]. Stick them in a muffin tin to make little crusts (bottom right photo).

The Apples
Meanwhile, slice up apples. I love sour apples, so I used a mixture of Granny Smith and Cortland apples. Thinly slice the apples and toss them in a mixture of sugar, cinnamon, and lemon/lime juice. I really don't like my apple pies very sweet, so I only added a little more than 1/8 cup sugar for 2 apples, which I think is on the low side.

Fill up your muffin tin, and you're ready to bake!
Bake at 400 °F for about 25-30 minutes.
The Outer Apple

Meanwhile, prepare your apple outsides. I scored the apple first and then used a spoon to sort of "flick" out the pieces. I ended up using the spoon to scoop out the remaining apple as well. It's possible that a melon baller would have been useful here, but I had no such gadgets in my tiny little kitchen.
Putting It All Together

Finally, when the pie is done baking, let it cool a little before placing inside the cored out apple. And that's it! If you plan on transporting it, I would recommend packing the two pieces separately and then assemble it at the final location.

If you want, you can use the "cap" as a base, making a goblet of sorts.
Serve and enjoy!

I can't really take credit for this ingeniously creative little thing. My husband, who can be oh-so-creative when you least expect it, came up with this cute apple pie idea.
No comments :
Post a Comment